Friday, 25 October 2013

Pillowcase Dress for Emilie!

Well, my little Emilie turned 1 this week and that means it's time for her 1 year pictures! When Annalise turned 1 I made her a cute tutu for her pictures (I should post that one some day) and I wanted to do something different for Emilie. I've been seeing a lot about pillowcase dresses in my browsing of Pinterest and the internet in general. There are probably thousands of tutorials for these online. I picked one that I thought made the most sense and went with it. The lady who wrote it up doesn't always use actual pillowcases but I did with this dress in order to be true to its name. I picked up the pillowcase at Target. I also made a matching headband with the left over fabric that I cut off.

Supplies needed: 1 pillowcase, bias tape in a coordinating colour, thread in a coordinating colour, elastic, and a sewing machine (of course).

I totally forgot to take progress pictures and I apologize for that. I just got in the zone and kept going until it was done. :( I'll have to post reminders around me next time to take progress pictures. :)

I looked online for tutorials for the headband and ric rac rose but wasn't pleased with any of them so I sort of just did my own thing.
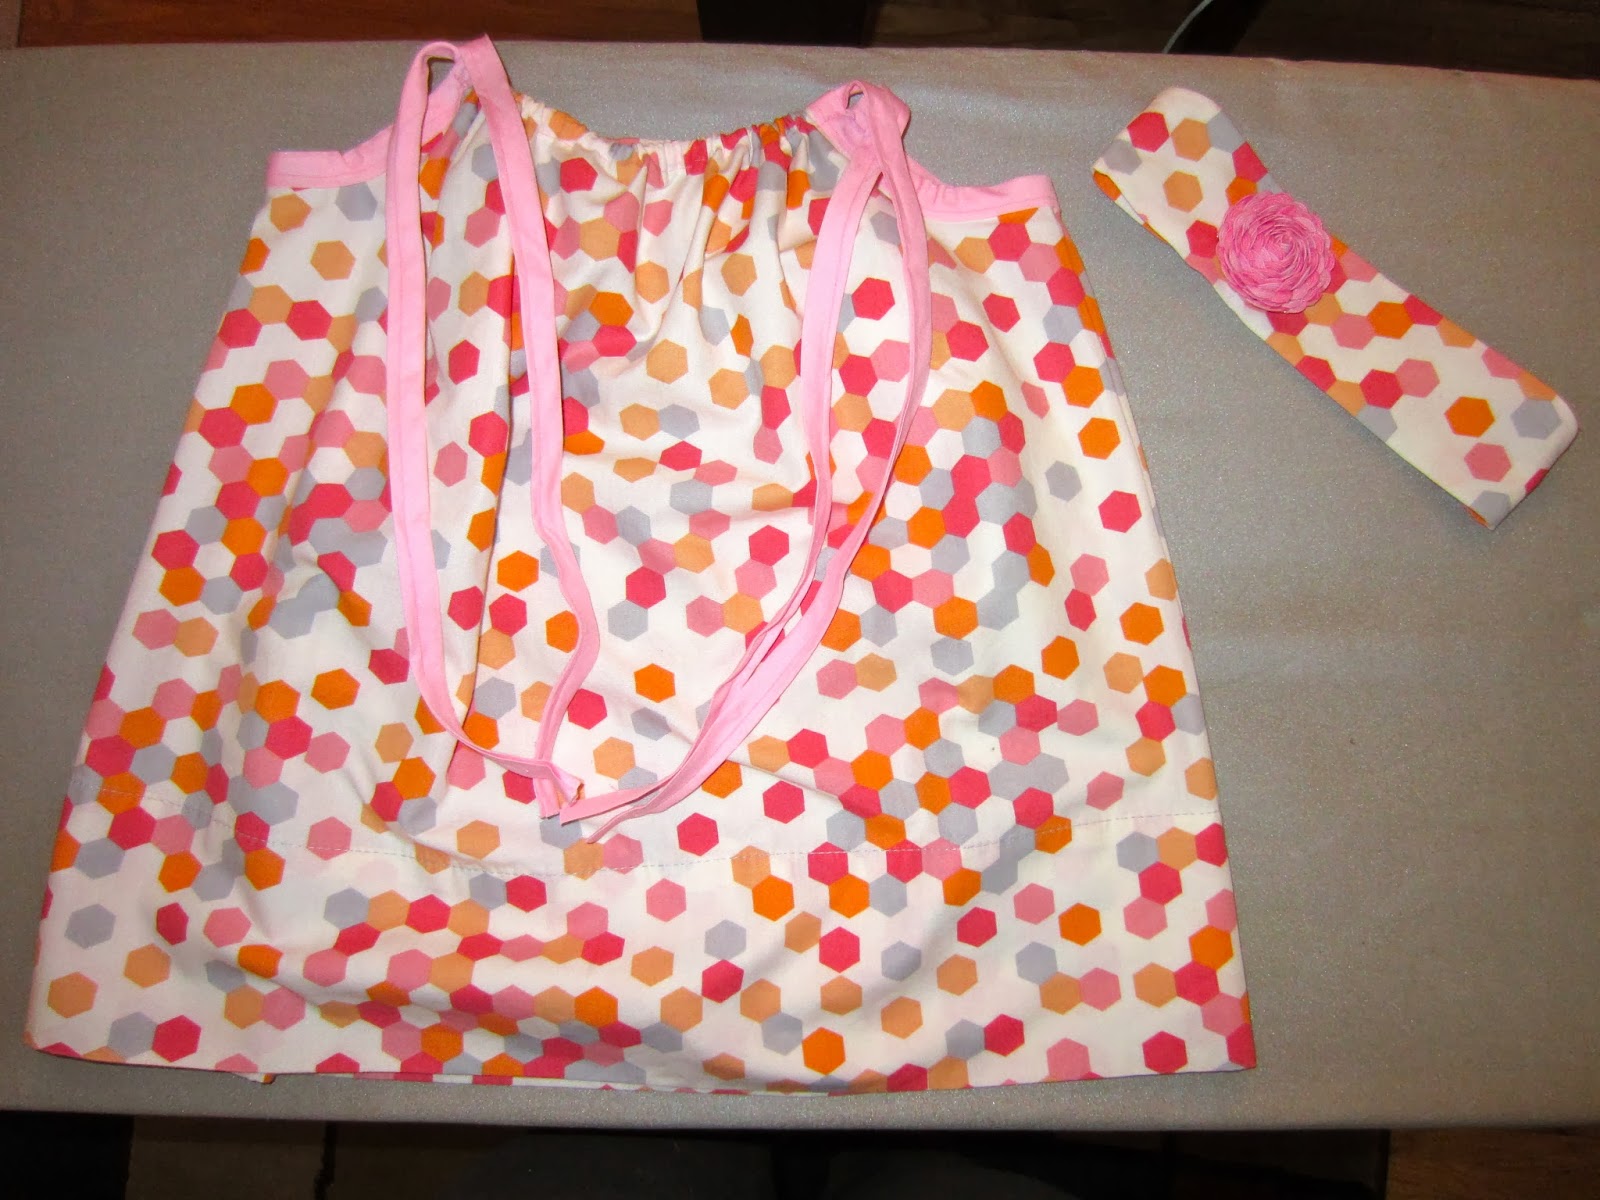


Here's the dress and headband together. The dress had already been tried on by Emilie so it's all ruffled up already - that's a good thing. :) I used bias tape at the arm holes as per the tutorial linked to above and am so glad I did! Bias tape is my new best friend in sewing. (Darran says that's not very objective and that I'm being biased ... but that's his sense of humour for you!) :)


Just the dress here. I LOVE this pattern on this pillowcase. Couldn't find anything that I was this happy with at any other store so hooray for Target!


Here's a close up of the headband with the ric rac rose. For the headband, I just cut out fabric on the fold to the width I wanted and a length that would fit around Emilie's head (or almost around as I was going to add a bit of elastic at the bottom). I hemmed the short ends with a very narrow hem then folded it in half the long way with the right sides facing. I sewed down the long side. Then I attached a safety pin to one short end and passed it through to the other end to turn the headband right side out. this takes time and you need to be patient. :) I cut a 3 inch length of elastic - I had a few different widths, just picked one that fit best in the end of the headband. I needed about 2.5 inches to make the headband fit on her head and then another half inch to allow for the ends to be sewn into the headband. This I did with a straight stitch. Very easy. :) The ric rac rose I did by braiding two contrasting colours of ric rac. I wrapped it around itself (does that sound like it makes sense?) adding a dot of hot glue every now and then to make sure it holds together (I did read this in one tutorial and that was a helpful tip). Then I pushed out some of the layers. I found they didn't like to stay flat so I hot glued them down together to the ones I wanted to stay open would actually stay open. I then hot glued the rose to the headband. I rather like how it turned out. However, Emilie hates anything on her head so I'm sure it won't stay on long. :)


My littlest princess modelling her dress. :) She saw the camera and decided she should sit down. :)


I convinced her to stand up so she decided to run to me - had to snap this picture quickly! :)


And here she's trying to decide if she should sit down or if she should go for a toy she just spotted. :)

I LOVE pillowcase dresses and how super easy they are to make (seriously, the headband probably took longer than the dress). I think I will be making more of these for my girls in the future. :)


Fawn the Fairy - Homemade by Me :)

Annalise's costume for her preschool Halloween party is Fawn the Fairy (from the Tinkerbell movies) She's pretty thrilled and I had tons of fun putting it together. I made the hair with a head band, ribbons and fake leaves, the belt from ribbon and fake leaves, the top from something I picked up at Value Village and the leggings from an old t-shirt. The wings are store-bought but absolutely perfect for the costume ... and since I made pretty much everything else, I think it's ok that I just bought the wings. :)


This is the jacket thing I picked up at Value Village. It had sequined type trim basically everywhere there was a hem of some sort. I took all that off and tossed it. The sleeves were way to long and I wanted it to be sleeveless (more realistic) so I chopped them off.

So here it is mostly complete. I chopped off the sleeves and took in the sides a bit (made a big mistake but covered it up alright ... but that's the reason for the lack of progress pictures). :) I put a snap button on where it comes together at the bottom of the v-neck so that it will stay closed. I hate working with satin and will probably not do it again for a long time.


So for the belt, I took some green ribbon, cut it to length (measured it around her waist), made 3 the same length, sewed them together at one end, braided them and sewed them at the other end. Then I sewed in 2 snap buttons to make it easier to close. :) After all that was done, I hot glued fake leaves all along the belt.

Here is the completed belt (excuse the knife and fork in the photo - apparently we had just had supper. :)                            
For the long braid, I used a plain brown headband that Annalise already had. I took a wide brown ribbon, measured it to be as long as Annalise is tall and cut 3 that length. I hot glued them at one end to the headband then braided them. I used a small length of the green ribbon to tie it off. I hot glued that in order to keep it more secure. Then I hot glued some fake leaves to that as well.  :) 

So here's the long braided ribbon hair. :)

And here's the completed belt.

I made these leggings out of an old t-shirt. I found this t-shirt at Value Village - men's, extra large. It is SO super easy and I think this is how I will be making leggings for the girls from now on. In order to make the "pattern" I just used a pair of capri leggings that currently fits Annalise. Then for the cuffs at the bottom, I cut out rounded/triangular shaped pieces from the t-shirt. I roughly sewed hems onto them and sewed them to the bottoms of the leggings. This picture was taken before I had the appropriate width of elastic to finish the leggings. :)

The completed outfit! For the rest of her hair, I took a brown crocheted cap she has and turned it inside out (because it had a pink flower and band crocheted onto the outside of it). :) Here she's a bit annoyed for a couple of reasons: 1. The wings are having a hard time staying open (I need to fix that somehow). and 2. There wasn't any pixie dust so she couldn't fly.

She has now realized how awesome the costume is and is super thrilled that I made it for her.

So happy ... even if she can't fly for real! :)

Saturday, 28 September 2013

September Challenge Part 3 - Pumpkins! :)

So this was the third week of the challenge and it was all about pumpkins. I've been wanting to do some sort of pumpkin craft so this was a great week to participate in. I had a few ideas, one is incomplete so I will post about it when it is done. Another idea I haven't done yet but am pretty excited to try it so I will post about that as well and, hopefully, will also be taking pictures of the process so I can do a bit of a tutorial. :) This week, however, I went with buttons as my medium. :) I had a couple old frames kicking around and, thankfully, my husband broke the glass from one of them so I was able to use that frame and just toss the broken glass. I LOVE digging through and sorting old buttons. My only disappointment is that I didn't have more variety in the sizes of the buttons. Better luck next time I guess! :)

Here's my pumpkin art for this week:


So basically what I did was cut a piece of white cardstock down to fit the frame. Then, I dug through my scrapbooking paper and found a nice orangey coloured patterned paper that I thought would suit this project well. I cut out a pumpkin shape (drew it on the back so I knew it would be a good shape) and then glued it near the bottom of the cardstock. I then sorted out the buttons trying to stick with pumpkin coloured buttons but, as long as they were fall colours, I was happy. And of course I needed green buttons for the stock. :) Then, with my hot glue gun in one hand and the buttons near the other, I got glueing! It took a while to complete but I really like how it turned out. :) I'm thinking I need to do something like this for every season! :) I'm also really psyched that the colour of the frame suited the project so well! :)

Somewhat Simple

September Challenge Part 2 - Paper :)

Yup, I've done another part of this creative September Challenge from Somewhat Simple. This week (which was really last week) was paper crafts. I wasn't online towards the end of last week and all of this week hence I'm behind on these blog posts. :) So, I was needing to find or make a card for friends who recently had a new baby. Better to make one and make it part of a challenge, eh? :)  I was feeling a creative block and couldn't come up with my own design so I followed this tutorial from Echoes of Laughter. I really love the end product. I couldn't find my buttons so I used a cutsie little sticker instead. It all worked out nicely and I think I will be making more cards like this for various occasions.

I used just one patterned paper for the underneath part and offset my pinwheel slightly. 
Now, I had intended to make more than just one card BUT my 3 year old Annalise decided she'd like to do some paper crafts as well. So I was left setting out craft supplies for her and trying (unsuccessfully) to keep her from using the purple glue stick as make-up. The following picture shows her paper art. Actually, it kills two birds with one stone - it's paper and it's a pumpkin (for week 3 of the challenge). I know you can't see the pumpkin very much but it is there underneath all the tissue paper and arms. yes, those long white papers are arms. She insisted her pumpkin needed arms. Although she did put a jack-o-lantern face on the pumpkin so I guess it makes sense that something with a face also needs arms. :)

Annalise's tissue paper covered, armed pumpkin! :)

Somewhat Simple

Monday, 16 September 2013

September Challenge Part 1 - Apron! :)

I had SO much fun making this apron! I used the idea from A Little of This, A Little of That. I love the idea of having a hand towel as part of the apron as it is a perfect place to wipe/dry your hands in the middle of whatever it is you are doing. The only issue I had was with the gathering. My thread kept snapping every time I tried pulling the bobbin thread! Not sure why this happened so I adapted and just pinned the fabric in pleats/ruffles to the tea towel and sewed it that way. It still looks all ruffley and I'm happy with it. The fabric I used is from a crib duvet cover I bought in the As-Is section at my local Ikea. I've now sewn 3 things from that fabric and have enough fabric left over for one more project ... and all for $6! :) So, without further ado, here are the photos:

Me Modelling The Apron

Laying flat on the coffee table. I'm annoyed because somehow I grabbed part of the ruffle up and sewed it into the top band ... just one little section and not terribly noticeable but still annoying!

My Little Annalise wanted to try it on too. She said, "You can share it with me Mommy!" :)

Friday, 13 September 2013

Creativity Challenge!

Yesterday in my email I saw something from a blog I follow about a September Challenge to get creative. I thought this would be a wonderful thing to try! So I'm going to go for it! :) Here's the link to the blog: http://www.somewhatsimple.com/september-challenge/ ... Now I just need to find out how to post a button to add it in to my blog. :)


Somewhat Simple

Tuesday, 10 September 2013

Ribbon Head Band Holder

So, my lovely 3 year old has been somehow becoming the owner of increasingly more head bands. Stuffing them in her sock and underwear drawer is just not working for us. :) So I decided it was time to make a head band holder. I've made a ribbon hair clip holder in the past and quite liked it (though now I have ideas for how to improve on that one to make it better). I believe I've blogged about it as well. I wanted to do something similar for the headband holder but decided it just wouldn't work to have the nice wood shapes at the top and bottom of the holder. Instead I followed some advice from the lovely author of this blog. I couldn't really make sense of how she made the ribbon loops (I was tired and having severe Mommy brain) so I experimented with a couple of different ways of doing it and found one I liked. It was more time consuming but I find they sit nicer than the alternative method. :) Without further ado, here are the photos:


The whole thing ... should have turned the flash off.


The top - close up of the loops


Side view of the loops. 


And here it is hanging on the wall with most of the headbands hanging in it. :)

So, I had a 30 inch piece of the blue (wide ribbon), a 15 and a 22 inch piece of the plain pink (narrow ribbon), and 11 separate 5 inch pieces of the in-between width of ribbon (pink with white polkadots) as well as a 1.5 - 2 inch piece of this pink with white polkadot ribbon. The 15 inch piece of the narrow pink ribbon gets wrapped tightly around the ring. The 22 inch piece is looped (about and inch) around the ring and glued to itself. The entire ribbon is then glued dow the centre of the wide blue ribbon. Then you start making loops with the 5 inch pieces. Make a loop by folding it together end to end. Hot-glue the ends together. Hot-glue that edge to the top edge of the blue ribbon so the loop part hangs down. Continue this process down the blue ribbon - gluing the loops just slightly under the loop above. Glue the bottom of the loop above to the top edge of the next loop and so on down the ribbon. You can add embellishments to the bottom if you desire or just leave it plain and simple. I know these instructions don't make a whole lot of sense without progress photos so I hope to do progress photos soon. :)

Annalise is very glad to have her headbands hanging nicely on her wall. (Only a first-born, OCDish child would like organization this much!) :)