Tuesday, 11 March 2014

Quiet Times With God

That's what we call my morning time so the girls understand: it's Mommy's quiet time with God. We talk about it often enough and model it (not as often as I should) so the eldest (Annalise, 3.5) asks if she can have her own quiet time with God. Since she's not yet reading, this doesn't always work well if she wants it at the same time as me. :) Most times the 2 girls just colour together while I have my quiet time. I do this most mornings and what a difference it makes in my days! I sure do miss it when I don't do it. Currently I'm working though a few things. I'm reading Don't Waste Your Life and working through the accompanying study guide in preparation for each Thursday morning Coffee Break at church. I also choose a devotional to read. Currently that is the book The Furious Longing of God by Brennan Manning (fabulous author)! Though the book I choose isn't always labelled as a devotional, I treat it as such as it is something that turns my mind and heart to God. I also am following a Bible reading plan taking me through the Bible. The one I currently follow does not have me reading every chapter but key chapters in each Bible book. It's a good overview plan. :) Finally I end with my journal. In here I write my thoughts that I've had from my reading or just things I've thought about throughout the morning or previous day or things that my kids said/did that prompted some interesting thought or lesson in my life. I also use it as a prayer/thankfulness journal. I find that practice especially useful, beneficial and enjoyable. It is so good to start the day with God! It is water to a thirsty soul. It gives encouragement and comfort on days that start a little blue. It gives peace in times of anxiety. It gives joy each and every time! :) Perhaps someday I should start blogging about my journal entries. I'd have to flesh them out a bit but that would be a good practice to do! :) I'm eager to see what Annalise will do with her quiet time once she can read! :)


My Current Quiet Time Supplies. :) (Coffee is always essential). :)

The girls keeping busy with their own quiet time. :)

Friday, 7 March 2014

Five Minute Friday - A Willing Heart

This week's Five Minute Friday word from Lisa-Jo Baker is "Willing". I wish I had more than 5 minutes! :) This is a good exercise, to write for 5 minutes (without editing!), a good way to practice getting those thoughts we have on paper! :) Here follows my thoughts on "Willing":


A Willing Heart

A willing heart is malleable. And I wonder if this mama has a willing heart. I love my girls, don’t get me wrong, but sometimes I’m just really selfish about my time and space. And willingness to interact positively with those girls is just lacking at those times. Willingness to play, to read, to craft … and in those activities, to teach. How many teachable moments have I lost simply because I wasn’t willing to let go of my own selfish desires? Today is a new day. Today is a day where I am willing, a day I remind myself of the need to be willing. A day where I need to consciously choose to be willing to play, to read, to craft, maybe even to bake (with a 3.5 year old?!?!) … k, that last one might be a tad crazy.


When I think about examples of willingness to emulate, I think about my 3.5 year old daughter. Like this morning when I commented to Darran (in pride) how impressed I was that we’ve been able to keep our house quite tidy for at least 1 whole week and that we need to make effort to keep it tidy! Annalise piped up, “No Mommy, it’s not really tidy yet. There are still things to pick up … like those newspapers! I will do that for you Mommy!” And she did! Just like that! And she was proud of her success in tidying. And I was proud of her unselfish willingness to help. Yesterday she tried to sweep the kitchen floor (and hurt herself in the process by getting the broom stuck and jabbing her gut with it). Instead of thanking her for her help and willingness to help, I criticized her for doing something she didn’t even ask about first! Instead of praising a servant heart, I criticized! Oh, if only my heart could be as willing as hers!


(Please also follow my other blog: Confessions of A Pinterest Addict) :)


Five Minute Friday

Friday, 21 February 2014

Five Minute Friday: Small

Today I decided to participate in a writing exercise from a blog I follow: Lisa-Jo Baker - surprised by motherhood. I really enjoy her blog posts and I really need motivation to get writing again so I thought I'd give it a try and, surprise surprise, my girls actually gave me 5 relatively quiet minutes so that I could write! :) So, here's my write-up (as you can see, I'm pretty rusty but hope I improve with time!):

Small

Small seems insignificant, easily disregarded. But small is precious. What is small? My daughters’ hands reaching for hugs, their lips leaning in to kiss and whisper their secrets to their Mama. Mama – that’s a small word full of love. And what about the flowers in the garden? Small … beautiful. The worms that naturally till the soil … small … strong. The spiders that spin their webs? Small … brilliant. And that still small voice that quenches our longing, that brings us peace and comfort, that convicts and changes us? It’s small and grand … it’s God’s voice! Small is important and small is a servant, humble.

Small and insignificant is how I feel my written word comes across. It looks rather small, doesn’t it? I turn to poetry, also small but speaks in much louder volumes. :) (And small smiles always find their way in my writing). Poetry is what my heart speaks and I guess my heart speaks small. :)

A Small Poem
Small is the kisses of my daughters
Small is my kiss for them
Great is our love for each other!

Small is the toys we trip on in the dark
Small is the spilled food at the table
Great is my affection for my daughters!

Small is the words the say
Small is the songs they sing
Great is my love as I listen!

Small is the hug I can give them
Small is the word of encouragement
Great is their growth in our love!
Five Minute Friday

Friday, 14 February 2014

Delay in Creativity

Wow! Can it really be October since I've posted?! I'm finding creativity lacking these days. I think it has something to do with the fact that I don't have a proper space to craft in and the clutter we have in the one floor we can currently live in is a bit hard to handle. Honestly, once I have my basement back, this clutter will all have a place to be organized. I'm really looking forward to that. So my goal is to clean up a little bit in the dining room so I can do my crafts and teach some crafts to my lovely 3yo. :) I did do some crafting in December and intended to post about it here but apparently forgot ... this is what happens when busy Christmas season comes, people come to visit, kids get sick and then you take a trip to Mexico. Shoot, I didn't even do a Valentine's craft with the kids this year! We will be back with more creativity soon I hope! :)

Friday, 1 November 2013

October - a month for giving thanks

I want to teach my kids to be thankful for everything and in every circumstance. This past year or so, I've read One Thousand Gifts by Ann Voskamp (as well as the One Thousand Gifts devotional). This inspired me to find a creative way to teach my oldest (Annalise) thankfulness. My youngest is too young to understand this yet. What I did was make a tree out of construction paper and tape it to the front door. Then, throughout the month, we wrote things that we were thankful for on Fall coloured leaves and taped them to the tree. I will be doing this again next year but then I want to make more of an effort to do it everyday (I'm thinking we could do it every morning when we wake up and every night before we go to bed). Annalise really enjoyed being part of this and it was wonderful to see development/growth in her ideas of things to be thankful for: from "trees" or "stuffies" to friends and teachers (each listed by name) and God. We were able to get 76 different leaves/ideas on that tree! We started October 1st and ended October 31st. Here's a photo of the completed tree. :)


I already posted this to Facebook (sorry for the double posting friends) but then decided I need to blog about it as well. :)  I think I will do the same thing for November, this time focussing on Remembrance Day. :) Perhaps it will be a poppy field. But that will be for a different blog post.

Friday, 25 October 2013

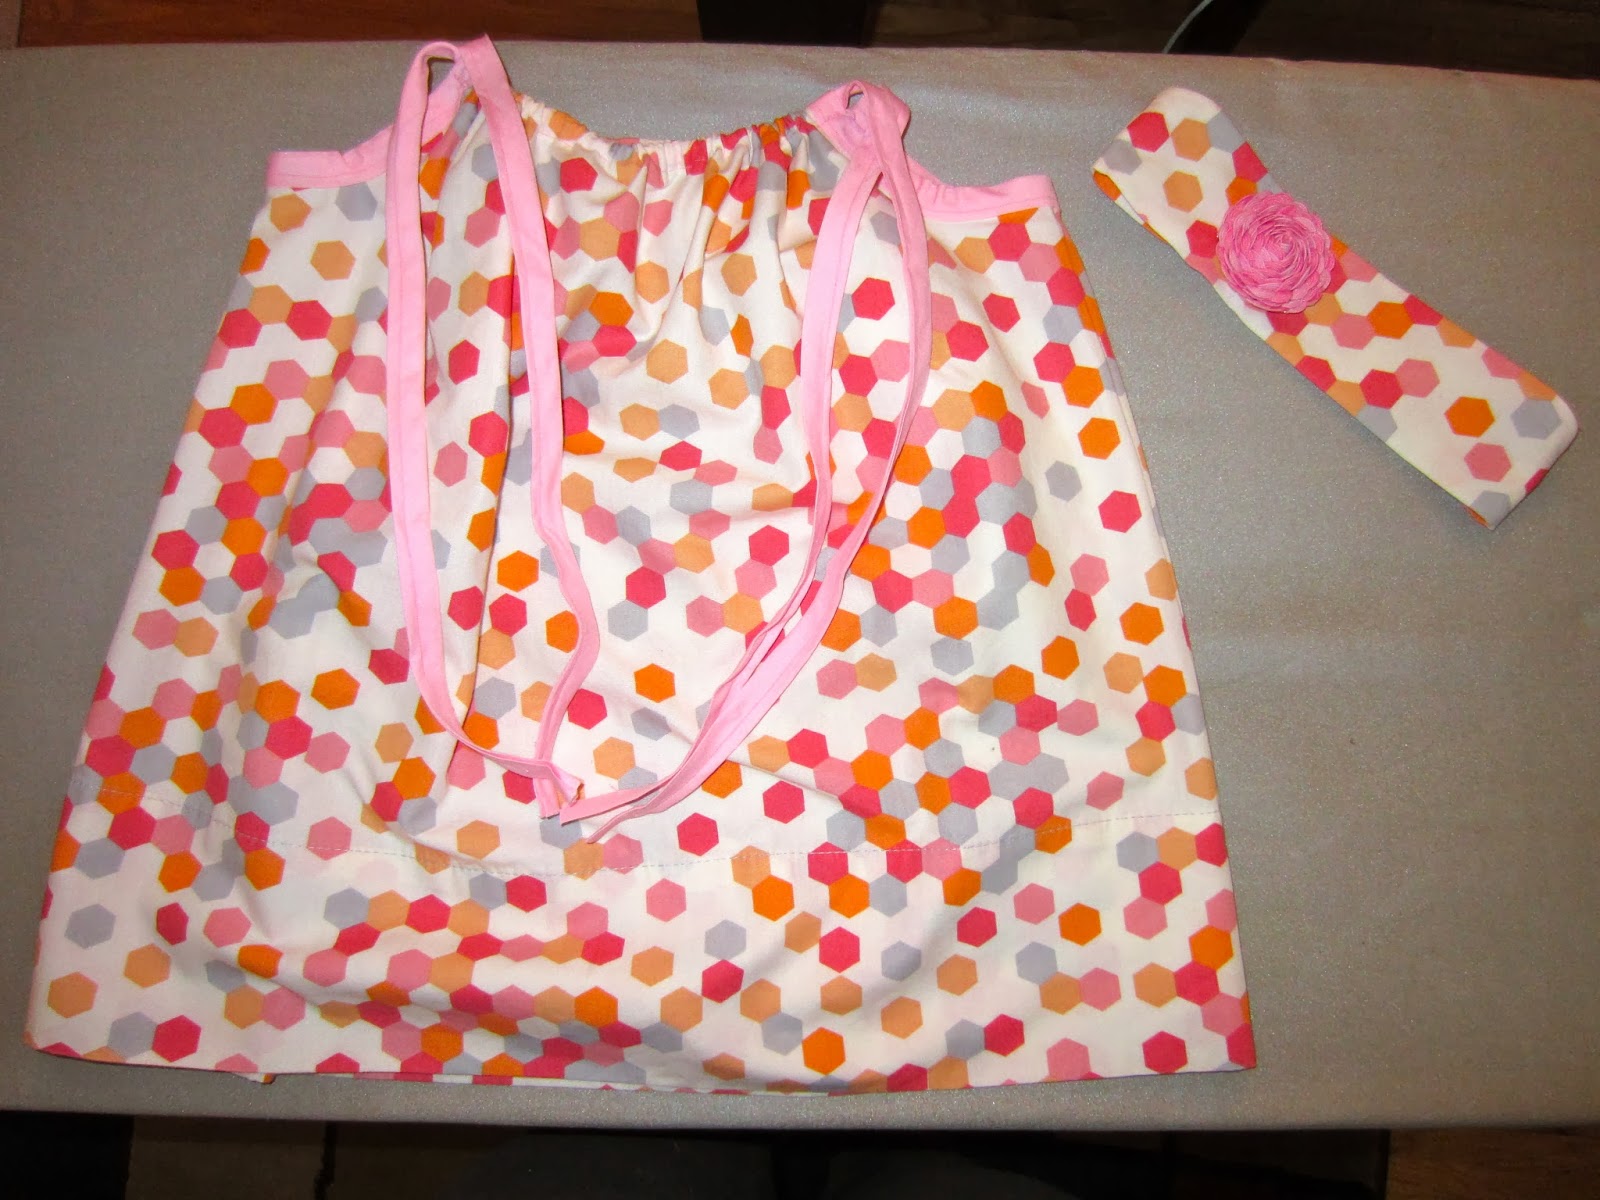
Pillowcase Dress for Emilie!

Well, my little Emilie turned 1 this week and that means it's time for her 1 year pictures! When Annalise turned 1 I made her a cute tutu for her pictures (I should post that one some day) and I wanted to do something different for Emilie. I've been seeing a lot about pillowcase dresses in my browsing of Pinterest and the internet in general. There are probably thousands of tutorials for these online. I picked one that I thought made the most sense and went with it. The lady who wrote it up doesn't always use actual pillowcases but I did with this dress in order to be true to its name. I picked up the pillowcase at Target. I also made a matching headband with the left over fabric that I cut off.

Supplies needed: 1 pillowcase, bias tape in a coordinating colour, thread in a coordinating colour, elastic, and a sewing machine (of course).

I totally forgot to take progress pictures and I apologize for that. I just got in the zone and kept going until it was done. :( I'll have to post reminders around me next time to take progress pictures. :)

I looked online for tutorials for the headband and ric rac rose but wasn't pleased with any of them so I sort of just did my own thing.


Here's the dress and headband together. The dress had already been tried on by Emilie so it's all ruffled up already - that's a good thing. :) I used bias tape at the arm holes as per the tutorial linked to above and am so glad I did! Bias tape is my new best friend in sewing. (Darran says that's not very objective and that I'm being biased ... but that's his sense of humour for you!) :)


Just the dress here. I LOVE this pattern on this pillowcase. Couldn't find anything that I was this happy with at any other store so hooray for Target!


Here's a close up of the headband with the ric rac rose. For the headband, I just cut out fabric on the fold to the width I wanted and a length that would fit around Emilie's head (or almost around as I was going to add a bit of elastic at the bottom). I hemmed the short ends with a very narrow hem then folded it in half the long way with the right sides facing. I sewed down the long side. Then I attached a safety pin to one short end and passed it through to the other end to turn the headband right side out. this takes time and you need to be patient. :) I cut a 3 inch length of elastic - I had a few different widths, just picked one that fit best in the end of the headband. I needed about 2.5 inches to make the headband fit on her head and then another half inch to allow for the ends to be sewn into the headband. This I did with a straight stitch. Very easy. :) The ric rac rose I did by braiding two contrasting colours of ric rac. I wrapped it around itself (does that sound like it makes sense?) adding a dot of hot glue every now and then to make sure it holds together (I did read this in one tutorial and that was a helpful tip). Then I pushed out some of the layers. I found they didn't like to stay flat so I hot glued them down together to the ones I wanted to stay open would actually stay open. I then hot glued the rose to the headband. I rather like how it turned out. However, Emilie hates anything on her head so I'm sure it won't stay on long. :)


My littlest princess modelling her dress. :) She saw the camera and decided she should sit down. :)


I convinced her to stand up so she decided to run to me - had to snap this picture quickly! :)


And here she's trying to decide if she should sit down or if she should go for a toy she just spotted. :)

I LOVE pillowcase dresses and how super easy they are to make (seriously, the headband probably took longer than the dress). I think I will be making more of these for my girls in the future. :)


Fawn the Fairy - Homemade by Me :)

Annalise's costume for her preschool Halloween party is Fawn the Fairy (from the Tinkerbell movies) She's pretty thrilled and I had tons of fun putting it together. I made the hair with a head band, ribbons and fake leaves, the belt from ribbon and fake leaves, the top from something I picked up at Value Village and the leggings from an old t-shirt. The wings are store-bought but absolutely perfect for the costume ... and since I made pretty much everything else, I think it's ok that I just bought the wings. :)


This is the jacket thing I picked up at Value Village. It had sequined type trim basically everywhere there was a hem of some sort. I took all that off and tossed it. The sleeves were way to long and I wanted it to be sleeveless (more realistic) so I chopped them off.

So here it is mostly complete. I chopped off the sleeves and took in the sides a bit (made a big mistake but covered it up alright ... but that's the reason for the lack of progress pictures). :) I put a snap button on where it comes together at the bottom of the v-neck so that it will stay closed. I hate working with satin and will probably not do it again for a long time.


So for the belt, I took some green ribbon, cut it to length (measured it around her waist), made 3 the same length, sewed them together at one end, braided them and sewed them at the other end. Then I sewed in 2 snap buttons to make it easier to close. :) After all that was done, I hot glued fake leaves all along the belt.

Here is the completed belt (excuse the knife and fork in the photo - apparently we had just had supper. :)                            
For the long braid, I used a plain brown headband that Annalise already had. I took a wide brown ribbon, measured it to be as long as Annalise is tall and cut 3 that length. I hot glued them at one end to the headband then braided them. I used a small length of the green ribbon to tie it off. I hot glued that in order to keep it more secure. Then I hot glued some fake leaves to that as well.  :) 

So here's the long braided ribbon hair. :)

And here's the completed belt.

I made these leggings out of an old t-shirt. I found this t-shirt at Value Village - men's, extra large. It is SO super easy and I think this is how I will be making leggings for the girls from now on. In order to make the "pattern" I just used a pair of capri leggings that currently fits Annalise. Then for the cuffs at the bottom, I cut out rounded/triangular shaped pieces from the t-shirt. I roughly sewed hems onto them and sewed them to the bottoms of the leggings. This picture was taken before I had the appropriate width of elastic to finish the leggings. :)

The completed outfit! For the rest of her hair, I took a brown crocheted cap she has and turned it inside out (because it had a pink flower and band crocheted onto the outside of it). :) Here she's a bit annoyed for a couple of reasons: 1. The wings are having a hard time staying open (I need to fix that somehow). and 2. There wasn't any pixie dust so she couldn't fly.

She has now realized how awesome the costume is and is super thrilled that I made it for her.

So happy ... even if she can't fly for real! :)