Friday, 3 October 2014

{Day 3} Pizza!!

This week has been cray busy! I needed a break today so, from the approval of many, I bring to you pizza! :) We make our own pizza dough. Honestly, we mostly just follow the recipe in the bread maker manual (it is one thing I regularly use the bread maker for ... in fact we have pizza every Friday!) but I make some changes. My favourite is to use garlic infused olive oil instead of just regular olive oil ... the hint of garlic in there is amazing, especially for our appetizer pizzas! :) I will also, on occasion, add italian seasoning to the ingredients so it mixes in the dough but this one I will usually only do when we have pizza with a tomato based sauce (a more traditional pizza). Our favourite pizzas are BBQ Chicken (which is on the menu for tonight), Chicken Bacon Ranch, and Farmer's Sausage with Onion! They are fabulous. Here are instructions for them all (but photos only of today's pizzas: BBQ Chicken and the appetizer cheese pizza). We also like thin crust pizza so, the small dough that our bread maker says is sufficient for one pizza we actually split over two pizzas and we get beautiful, crisp thin crusts! :)

BBQ Chicken Pizza

Ingredients:
pizza dough (1/2 recipe if you like thin crust)
BBQ sauce of your choice (our favourites are Cattle Boys or the Club House Wild Whiskey Smoked BBQ)
Chicken cut into 1" pieces and seasoned with Buffalo Wild Wings Chipotle BBQ Fire Roasted seasoning before frying (FYI Buffalo Wild Wings is the absolutely best place to go to eat fabulous wings!)
Mozza cheese
Cheddar cheese

Directions:
Roll out dough and spread on pizza pan (sprinkle corn meal on pizza pan to prevent sticking). Liberally spread your BBQ sauce onto the crust. Then place your chicken over that and top with your mozza cheese and a bit of cheddar to give it some extra zip. Bake as per recommendations of your bread machine but if you're going with a thin crust, 400 F for 20 minutes is good. :)

Chicken Bacon Ranch Pizza

Ingredients:
pizza dough (1/2 recipe for thin crust)
Ranch salad dressing (we prefer the Hidden Valley brand but Kraft is good too)
Chicken cut into 1" pieces and seasoned with salt and pepper before frying)
Green onions, chopped
Real bacon bits
Mozza cheese
Cheddar cheese

Directions:
Roll out dough and spread on pizza pan. Sprinkle corn meal on pizza pan first to prevent sticking. Liberally spread your Ranch dressing over the crust. Sprinkle with most of your mozza cheese. Place your chicken next and sprinkle with green onions and bacon bits. Top with the rest of the mozza cheese and a bit of cheddar for added zip. :) Bake as per recommendations of your bread machine but if you're going with a thin crust, 400 F for 20 minutes is good. :)

Farmer's Sausage and Onion Pizza

Ingredients:
pizza dough (1/2 recipe for thin crust)
BBQ sauce of your choice (though I highly recommend the Wild Whiskey Smoked BBQ for this one)
1-2 farmer's sausages fried up and then cut into small slices
1 onion chopped and fried up in butter
Mozza cheese
Cheddar cheese

Directions:
Roll out dough and spread on pizza pan. Sprinkle corn meal on pizza pan first to prevent sticking. Liberally spread your BBQ sauce over the crust. Give the sausages a quick fry whole (to make cutting them up easier). Remove to a plate, slice up, return to pan to finish frying along with chopped onions. When onions are looking nice and caramelly (I can count that as a word right? :) ) and sausage is fried, removed to a bowl (you can remove some grease if you want but I don't usually). Spread sausage and onion over your pizza. Top with the mozza cheese and a bit of cheddar (cheddar gives it extra zip)! :) Bake as per recommendations of your bread machine but if you're going with a thin crust, 400 F for 20 minutes is good. :)

Appetizer Cheese Pizza

Ingredients:
pizza crust (1/2 recipe for thin crust)
Italian salad dressing (the Kraft Tuscan Italian Olive Oil dressing is best)
Garlic salt
Mozza cheese
Cheddar cheese
Parmesan cheese

Directions:
Roll out dough and spread on pizza pan. Sprinkle corn meal on pizza pan first to prevent sticking. Liberally spread your Italian dressing over the crust. Sprinkle a bit of garlic salt on top of this (more if you didn't put garlic infused olive oil in the crust, less if you did). Top with a good sized amount of mozza cheese, a bit of cheddar and a sprinkle of parmesan. Bake at 400F for 20 minutes. :)

OK, some pictures! And I need to apologize for them. I intended to take photos before we all dug into the deliciousness that is our homemade pizza BUT they are so awesome and everyone was so hungry that we all grabbed some before I could take photos. And I'm pregnant so my memory isn't so great sometimes. :) Anyways, we were almost done the pizza before I remembered to take a photo. :) So you get one photo with both pizzas in it.

The one on the left is the appetizer cheese pizza and the one on the right is the BBQ chicken pizza. :) I'm please to say that there was nothing left by the end of the meal. :)

This is not a typical "bread" so to speak, but as I was reminded earlier today, pizza dough has flour and yeast so we can easily call it bread! :) I hope some of these pizzas intrigue you and that you try them yourselves. Oh! Before I forget, the Farmer's Sausage one is also really nice with a mild Italian sausage in place of the Farmer's Sausage. :)

Five Minute Friday: New

In the midst of all this newness of the 31 Day challenge, we still get our Five Minute Friday writing prompts from Kate. Yay! :) Today our word is "new".

For those unfamiliar with this, this is where we are given a one-word writing prompt and we write for 5 minutes, no editing, no rethinking, no overthinking ... just write! :) I rather enjoy the exercise most weeks! :)

START


Perfect for the beginning of a new month – everything is so new! The weather has changed, letting us know it really is Autumn now … and oh what a beautiful season it is! Do you know that every Autumn is a new Autumn? This one is nothing like last year’s – colours change differently, leaves fall at different times, … there’s similarities, of course, but it’s still all so new! And then I get to see it through the eyes of my 4yo and 2yo and I see the newness that much more!

We started our new Thanksgiving tree … and I get to see how my 4yo has matured since last year. She has deeper, wiser thoughts of things to be thankful for – this is new … and beautiful. :) And her words teach and encourage her little sister … that’s new too! This idea that I’m no longer my child’s primary teacher. I was for the first born – the only example available to her most of the time during the day … but for the second? It’s not just me, it’s her big sister too! What responsibility for a big sister … and for a mommy!

And then there’s this new life that’s kicking and squirming and tickling (yes, tickling) inside of me… absolutely beautiful!

“New” is so often something to be afraid of: “I don’t want to try new things! I’m content with what I already have and do! I'm afraid of the change!” But new is beautiful! When we shut ourselves off to new, we shut ourselves off to beauty!


Embrace the new, grow in the new!

STOP


Thursday, 2 October 2014

{Day 2} Early Morning Deliciousness - Overnight Breakfast Buns


Yesterday I stressed over which bread I should make for today's post. I wanted something easy because Thursdays are crazy busy for me and I knew that I'd also have to have time to write this post. :) I thought doing something overnight that could bake first thing in the morning would be best. So, looking through my list of breads, I found the Overnight Breakfast Buns from Company's Coming! Perfect!

These are NOT as easy as they sound! Especially if you forget that you're supposed to start them on time and are then forced to start them right when you're busy preparing and eating dinner ... with your family. Yeah, timing is not my thing. :)

You prepare the dough the night before and bake first thing in the morning. When I got into the kitchen this morning, the smell of the dough was amazing. When I was a little girl, there were a couple old Mennonite women who'd regularly make fresh bread and buns. They would give us some of these buns to take home or to eat while we were at their houses. When I walked into my kitchen this morning my first thought was, "It smells like Nellie Dyck's house!" (She was one of those women.) ... And the buns remind me of the buns she made! This is a good thing!! :)

So, this is NOT my own recipe, as I mentioned earlier. And I don't think I will ever actually adapt the recipe (except to maybe give clearer instructions) as it's a pretty awesome bun the way it's written! :) So this can be found in the Company's Coming Breads book (written by Jean Pare), page 62. I've included the recipe here and added my helpful hints in italics.

Overnight Breakfast Buns

Ingredients:

Granulated Sugar                                       1 tsp
Warm water                                                ¼ cup
Active dry yeast                                         1 x ¼ oz (8g)

Boiling Water                                             2 ¾ cups
Granulated Sugar                                       1 cup
Butter or hard margarine                            ½ cup
Salt                                                             1 tbsp

All-purpose flour, approximately               8 cups

Directions:

Begin at 5:00 p.m. stir first amount of sugar in warm water in small bowl. Sprinkle yeast over top. Let stand 10 minutes. Stir to dissolve.

(While that is waiting do the next step … this is where the instructions could have been more clear for my tired, pregnancy addled mind as I started the next step when the 10 minutes were almost done and was in a bit of a fix trying to rush the water in the next step to a lukewarm temperature. :) )

Pour boiling water into large bowl. Stir in second amount of sugar, butter and salt until sugar is dissolved and butter is melted. (It should also have said that it would be better if butter was softened or it won’t melt very well). Cool to lukewarm. (You may need to put it in the fridge to speed up this process if the yeast is almost done resting.) Add yeast mixture.


Beat in about ¼ of the flour. Work in enough remaining flour until dough pulls away from sides of bowl. (It is helpful to use your stand mixer for this, with a dough hook, though you will have to probably finish it by hand to make sure all your flour gets mixed in. I ended up using just 7 ½ cups of flour instead of the full 8.) Place in greased bowl, turning once to grease top. Cover with a tea towel. Let stand on counter until 7:00 p.m. Punch dough down. Cover with tea towel. Let stand on counter until 10:00 p.m. Punch dough down. Divide into 36 egg-size pieces. Shape into buns. Arrange on greased baking sheets. Cover with tea towel. Let stand on kitchen counter until morning. Bake at 375 degrees Fahrenheit (190 Celsius) for 15 to 20 minutes. Makes 3 dozen.

As in the photo that started this post, these buns are delicious served warm with butter and jam ... and coffee on the side. In fact, coffee tastes amazing when accompanying these buns! Coffee served in my favourite Wendy Binks mug of course (she's an amazing gifted author and artist from Western Australia - google her!). :)

I bet you all want to see some more photos though, don't you?! :) Ok, I can oblige! :)

This is the dough after the last rising and before I punched it down prior to forming the buns.

One sheet of buns ready to rise through the night (I got 2 baking sheets full of buns!) :)

YUM! Fresh from the oven! :)

My Rainbow Dash loving 4 year old enjoying her second bun of the morning! :)

And my sweet almost 2 year old enjoying her bun with jam. :)


Oh, and I had to throw in this picture of beautiful flowers that my awesome husband bought me this week! :)

Wednesday, 1 October 2014

{Day 1} Sweet Rye Bread


Welcome to my first post in my new 31 day series! This won't go live on the link-up at the official 31 Days page until this evening but I couldn't resist sharing this already this morning!

We're off to a delicious start!! Today I bring you Sweet Rye Bread! I have adapted this recipe from a whole wheat bread recipe (mostly because I didn't have whole wheat flour on hand when I decided to make it! lol) I made this bread by hand, no mixer, no bread maker, just a bamboo mixing bowl, a wooden spoon and my own 2 hands/arms. :) Annalise enjoyed helping me find and add the ingredients. She is learning math skills with activities like this! She can do adding in her head really well with questions like: we added 2 cups of flour; how many more do we need to make 3? (but ask her "what's 2 and 1 more?" or "what's 2 + 1?" and she wouldn't be able to tell you). :)  This recipe could easily be made in a bread maker on the dough setting (but I'd still recommend baking it in the oven). I will include instructions for both making by hand or with a bread maker.

Sweet Rye Bread

Ingredients:

1 cup warm water
1 tbsp milk
2 tbsp oil
2 tbsp honey (I used fresh wildflower honey bought at a local farmer's market and it was amazing!)
2 tbsp brown sugar (either golden or dark but dark brown will give a darker colour and a more molasses-y flavour)
1 tsp salt
1 1/2 cups all-purpose flour
1 1/2 cups rye flour
2 tsp active dry yeast (or instant/bread-machine yeast if you're doing the dough in the bread machine)

Instructions:

1. Combine first 6 ingredients in a large mixing bowl.

2. Add the flours and yeast. Knead until the dough is smooth and elastic - about 10-15 minutes. Place dough in a greased bowl, turning once to grease the top. Cover with a clean towel and let rise until doubled in size (about an hour).

3. Preheat oven to 350 degrees.

4. Punch dough down. Knead for a few minutes until smooth and then form into a loaf. Place loaf into a greased pan and cover. Let rise in a warm place (on top of your pre-heating oven) until almost doubled in size (about 30-40 minutes).

5. Bake in 350 degree oven for 30-35 minutes.

6. Remove from oven and allow to rest in pan for a few minutes before removing it to a wire rack. Cover with a clean cloth. Slice and enjoy while still warm! This is a fabulous bread to have warm with cheese, especially spiced Gouda! :)

Instruction for using bread maker:

1. Combine ingredients in order suggested by bread machine manual.

2. Set bread machine to dough setting and turn on.

3. Preheat oven to 350 degrees.

4. At end of cycle, remove dough to a lightly floured surface. Punch down, knead for a few minutes and then form into a loaf. Place loaf into a greased pan and cover with a  clean fowl. Let rise in a warm place (on top of preheating oven) until almost doubled in size (30-40 minutes).

5. Bake in 350 degree oven for 30-35 minutes.

6. Remove from oven and allow to rest in pan for a few minutes before removing it to a wire rack. Cover with a clean cloth. Slice and enjoy while still warm! This is a fabulous bread to have warm with cheese, especially spiced Gouda! :)

Look at that loaf of deliciousness!! OOPS - forgot to take a picture before cutting a slice for my girls! :) They had been begging all afternoon for a taste of the bread! :)

Isn't that just a thing of beauty?! Darran, my darling husband, said it was delicious and quite moist! SO glad the family likes it!

I should also mention that this bread is FABULOUS with cheese, especially spiced Gouda! :)


Tuesday, 30 September 2014

How to Create and Add a Button to Your Blog

So, I decided to join up with this 31 Day Challenge this year and part of it means I have to make a button for my blog. This was a new challenge for me in itself and I got help from various sources but, when it came to adding it to my blog, I had to figure it out mostly on my own as most of the tutorials I found were for the old blogger format and, as a result, were hard to follow. They also weren't visual enough for me (even though I did manage with them). So I thought I'd attempt to come up with my own little tutorial. :)

So first things first: making the image for your button.

I used PicMonkey for this as I found that the easiest to use. You can also use Canva.

In PicMonkey, you will hover over the "design" link and it will give you some options. Choose "custom".


Next, it will want you to select your dimensions. Change the numbers they have to 100 x 100 (or 125 x 125 works too). Then click "Make it!"


Now you're in the image editor section. You will click the butterfly icon, as this will allow you to use one of the overlays they provide or add your own picture.


For the sake of this tutorial, I'm using an overlay they provide (most of them are free so make sure you just choose the free ones ... unless you really want to pay them). :) I also changed the canvas colour, which you can do in Basic Edits (the first option in the left hand menu).


Now, at the top of your screen are some words and images: Open, Save, Share, etc. The first arrow is "undo", the second is "redo", the third (with what looks like little papers and an arrow pointing down) is the button you want to save your work so far. It combines everything together. So go ahead and click that. A little monkey head should pop up on the left and say "combined". :)

Now click the "Tt" button/icon on the left menu. This will allow you to add text. A text box will show up on your image. Select your font on the left hand menu, select colour and size in the right hand menu that pops up. Click in the text box to add your text. Resize the text box if necessary. You can drag the text box to place it where you want it. Once you are happy with how it looks, click the combine button in the top menu again (the down arrow by the little papers). :)


Next, you're going to click the save button in the top menu and this is what will show up:


Give it a name where it currently says "untitled" and click "Save to my computer".

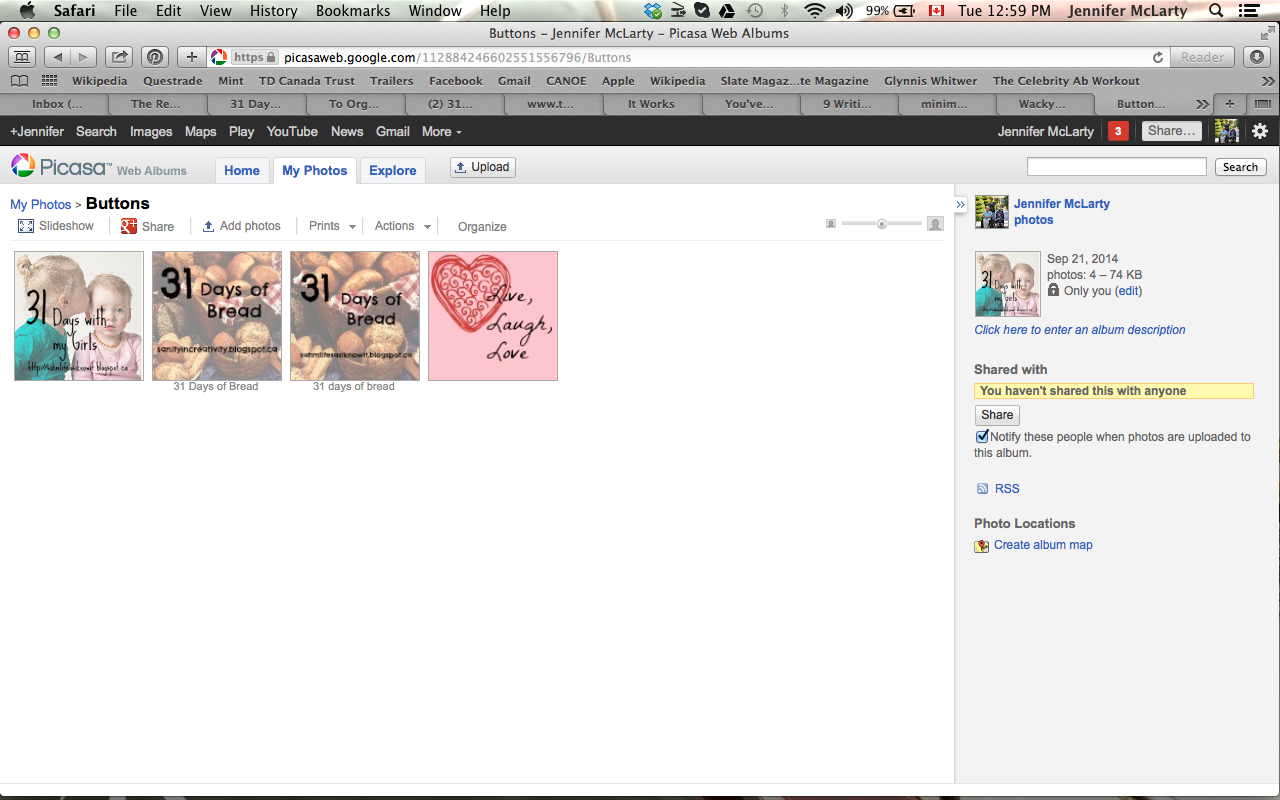
Next go to either Photobucket or Picasa Web Albums. I personally prefer Picasa (so this tutorial will show you how to use that to get your URL) as I find the Photobucket URLs unreliable - people end up with a picture of a question mark on their blogs where the button image should be (meaning the code can't access the image in Photobucket). In Picasa Web Albums, you will either add a new album or click on an existing album. Since I already have an album called "Buttons" I will use that.


Click "Add photo" at the top menu, find the image wherever you saved it on your computer, choose it, and add it to the album!


As you can see above, I have added my newly created "Live, Laugh, Love" button.

Now, click on the image of your button. It will open to a new screen. Then right click your image and you will get a drop down menu. Select "Copy Image Address". This will copy the Image URL to your clipboard.


OK, now you are ready to generate your code! YAY! :) So we're going to go this lovely site called Grab My Button. It will look like this:


In the space "Your image URL", paste the image URL you just copied from your image in Picasa Web Albums. Then you can add your blog name in the "Your website/blog Title" and your blog address/landing page in the "Your website/blog URL" space. For the sake of this tutorial, I'm using my daughter's blog. :)


Ignore all the information under "Choose Your Colors and Code Box Options". Instead, scroll down and click "Preview". You'll get a lovely pop-up image of your button and code. 


Click the green "Get Code" button. This will close the image and bring you to the section where you can select and copy your code.


OK, now that I have my code, I need to go back to my blogger blog (in this case, Annalise's blog), to add the button.

So, you will go to your blogger blog and select the layout in order to edit it.


As you can see in the image above, there are little spaces that say "Add a Gadget". You will choose one of these to add your button. I will choose the one in the side-bar because that's where I want the button to appear.  When you click "Add a Gadget", a number of menus of options will appear. The first option menu being "Basics". Scroll down in that menu until you see the one that says "HTML/JavaScript".


Once you click that, a text box appears for you to add a title and code. Give your button a title and, in the "content" section, paste the code you generated in the Grab my Button page.


Click "Save", which will bring you back to your Layout page, then click "Save Arrangement" which will save the button to your blog. If you want to move it around, you can drag it where you want and then click "Save Arrangement".

Now view your blog and you will see your button on the right hand side bar!! :


You did it!! Go celebrate (and maybe take a Tylenol for that headache you might now have)! :)


The above tutorial shows you how to make grab code for your button. If you want to make your image have a code that will simply bring the reader to the collection of posts related to that topic, I suggest this tutorial by Faith @ Sweet Violet. :)


Saturday, 27 September 2014

FMF: Because I'm a Mom...

Welcome to another instalment of Five Minute Friday where I join Kate Motaung and many other wonderful people world-wide to write on a word prompt given to us by Kate. Come join us! Either read the posts already written or write your own to add to the link-up! :) It is a wonderful writing exercise, sometimes more challenging than other times but always worth while to participate in!

This week the word Kate gave us is "because". The following post is not the post I intended to write but, as I sat in the salon chair this morning (yes, I know it's a day late), this is the post that came out. so I guess that means it was the post I needed to write.

START

Because I'm a mom, my life is often centred around children. My pre-mom life was too, being an elementary school teacher. But this is different - this is 24/7. (Teaching was more like 18/7 ... except in report card season! ;) )  And this also involves more of the heart (though, when I was teaching I wouldn't have thought it was possible for my heart to be even more involved in someone's life.)  But, being a mom (and a wife) makes your focus in life chance. There are new roles in which to bring glory to God and the weaknesses I have are suddenly more apparent, making that glorification more challenging. What's amazing its hat my husband and girls (and God) continue to love me through it all!!

Because I'm a mom, I start caring about more than myself. Though I care more about myself too - because if I don't take care of myself, how can I expect to take care of my family? Because I desire to take care of my family, it means making changes. It means a simpler life. It means removing clutter from my life: physical clutter (things; activities), emotional clutter (attitudes; people who bring you down; but doing things like downsizing Facebook use; and/or instead, surrounding yourself with positive, like-minded people), spiritual clutter (attitudes here too!; anything that keeps me from drawing closer to God; people with really messed up theology; instead, spending more time in the Word, in prayer, with God).

Because I'm a mom & wife who wants to take care of my family, it means saying "no" to many extra-curricular activities (even when all your peers are putting their kids, preschoolers and toddlers included, in various activities & playgroups nearly every day and evening of the week!!), saying "no" to participating in various groups, not jumping on every popular bandwagon that everyone around you seems to be jumping on. For me, it also means: making an effort to keep the house tidy, making healthy meals, cooking & baking from scratch. It also means not hovering over the kids and spending every waking moment with them but, instead, letting them learn to entertain themselves and develop their own imaginations.

Because I'm a mom ... things (blog posts?) can be late! :)

STOP


Wednesday, 24 September 2014

Bunn's Creek Trail

Today the girls and I went on another nature walk and, even though the weather didn't end up being what we expected, it was a gorgeous day for a walk! This time we took my sister and her youngest daughter along. :) A highlight of this walk is that there is a playground at the end of it so the girls were quite excited about that! We chose to walk today on the Bunn's Creek Trail. We did purposefully did not do the entire trail. My sister lives close to the trail and the walk from her places kind of forces us to start part-way through the trail. This is fine as it makes the trail more manageable for the little ones. We started up on Rothesay and ended up at McIvor Park. :)  The creek was much higher than I've seen it in the past in autumn ... but I haven't been there for a few years so things may have changed in the mean time. It was nice to see it flowing so freely, not so nice to see some of the trash people left around it. Let's take care of our trails, people!!  With the autumn season being upon us, we were able to see so many varieties in colours on the trees and it was fabulous! The kids were thrilled to experience all the beautiful nature! Before we left our own home, I pulled out a bag for my oldest daughter and gave her instructions to find samples of nature. She LOVED doing this and had very willing help from her cousin! :)  It was wonderful to see the girls running along the trail finding beautiful treasures of nature. I, personally, enjoyed seeing the wildflowers, the old trees (some fallen across the creek), and mysterious looking side trails that, really, only look mysterious because of the colours and light. :)

Of course, pictures are necessary:

The start of the trail (or at least our start of the trail). :)
These are not wildflowers - planted but still pretty!
     

Look at those colours! Greens, yellows, reds!
Old trees fallen over or evidence of beavers?
         

The beavers were here!
"Look-it!"


I took this photo because it had some strange white mouldy stuff growing on it and that seemed odd. :)
Walking so sweetly down the path!
                               

Beauty everywhere!
           

Wildflowers! Annalise thanked God for these today! 
Again, such beautiful colours!
           

Stopping to smell the flowers. :)


Loved this view - the colours and reflections!
I will have to draw these at some point! :)
           

The glee with which they run! :)
Silly antics at the top of the hill! :)
                         

Continuing their exploration run! :)


This sign made me laugh - considering the green grass around it. :)

Acorns!
Oak Tree!
                             

What amazing nuts, really!

Emilie enjoyed the slides!


Ducks!
                           

Emilie's Nature Collage
A collection of nature samples


Annalise's Nature Collage